Here is what you need:
* Some leather fabric leftovers (that hole bunch cost for me about .. 0.70 euros)
* Some flat-bottom beads that you like
* Fabric glue
* Glitter glue
* Scissors
* Ribbon

1. Place the beads in the shape you like the necklace to be. (I must say I played with them for a long time like it was a puzzle game).

2. Then start to glue them one by one on the leather. If you have glued all of them, let it dry for at least over night.

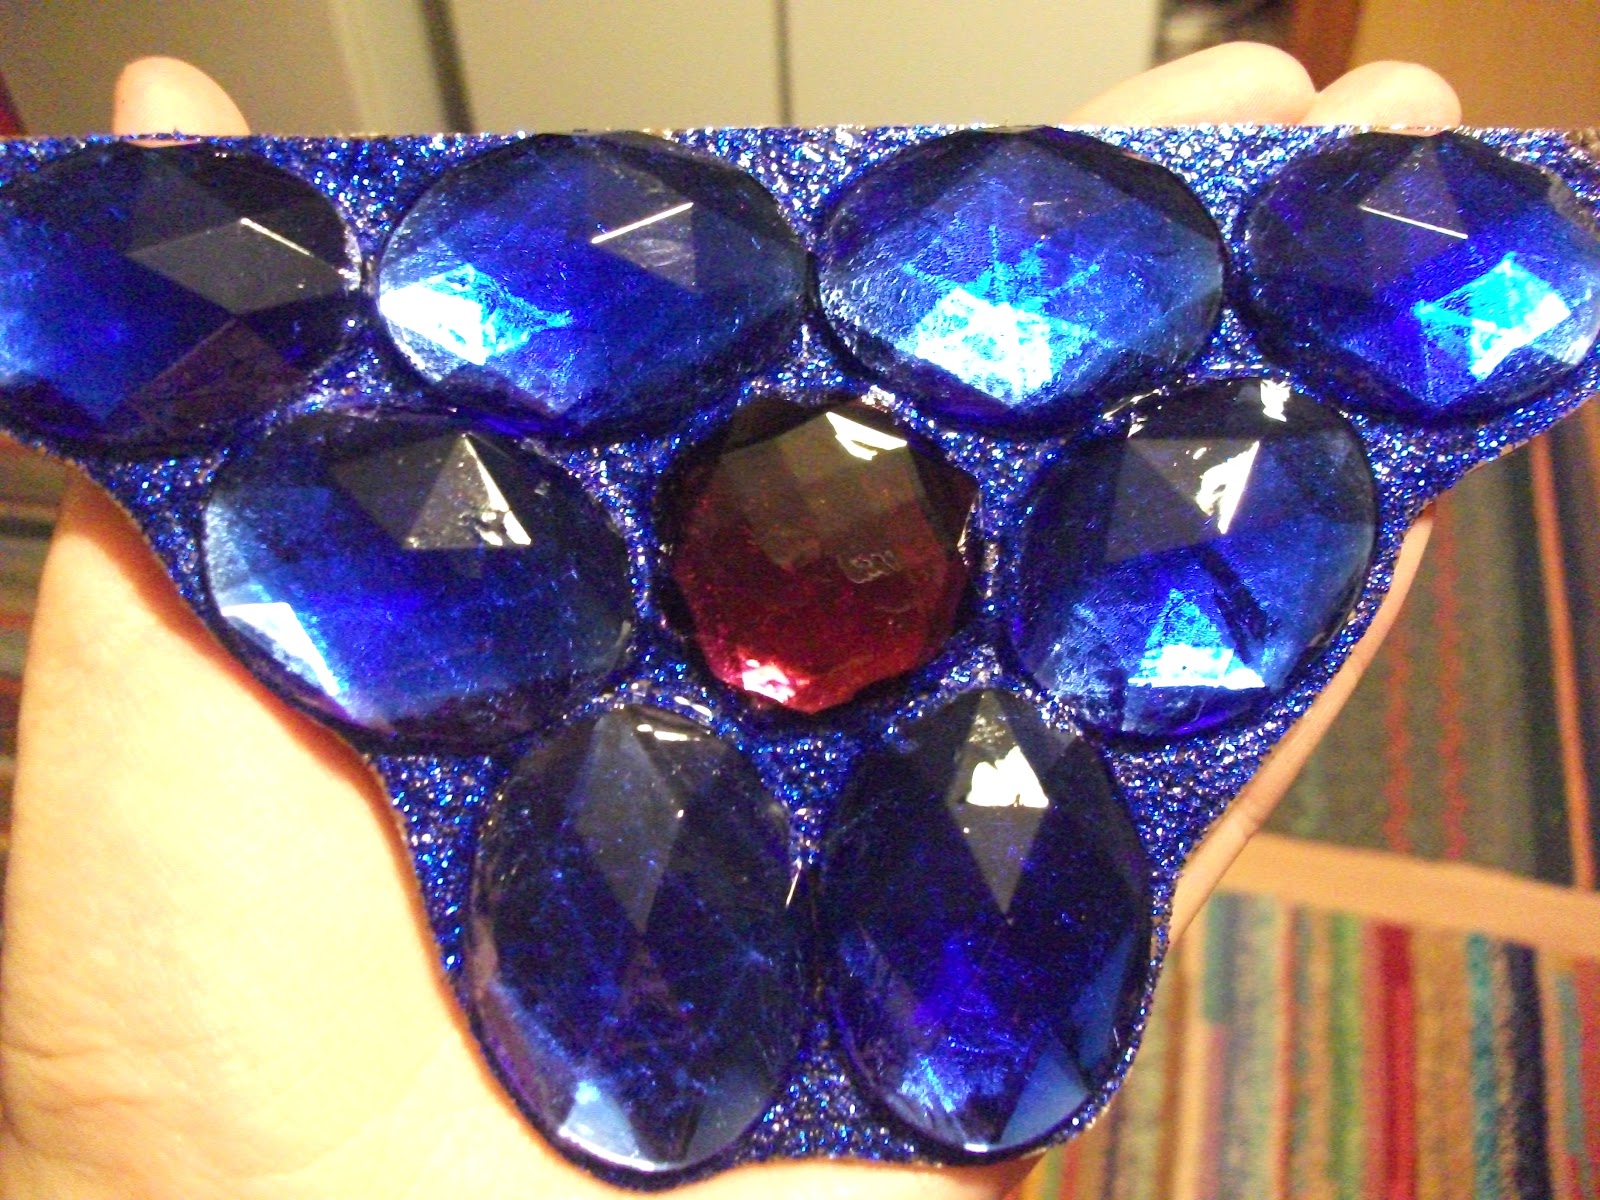
3. Fill the gaps with glitter glue. I did it twice because then it covered the fabric perfectly. (And I just love glitter of course). Let it dry for at least 24 hours!

4. For extra shine cover the beads and gaps with opaque nail polish - it gives beautiful shine + protects the glitter which is quite easy to come off otherwise.

5. After those steps it should all look very shiny like this:

6. Then take the ribbons and cut 2 equal pieces of them.

7. Now you see the reason why I didn't cover the ends with glitter - there you have to put the ribbons. I was very impatient so I didn't glue the ribbons. I just cut in a little hole with scissors, put the ribbon through it and tied it together - it still looks beautiful. As the final touch - cover the endings with glitter glue as well.

The final result should look like this:

Since now I'm waiting for the ends to dry you can't see me wearing this today but wait until tomorrow because I'm planning to wear this tomorrow and take some outfit shots as well :)
xoxo


No comments:
Post a Comment